CapCut is a powerful and user-friendly video editing application that offers a wide range of features and functionalities. One of its standout features is the ability to import custom fonts, which can enhance the visual appeal of your videos and bring a touch of creativity and individuality to your projects. In this tutorial, we will guide you through the steps to successfully import custom fonts in CapCut on both Android and PC.
How to Import Custom Fonts in CapCut Android
Step 1: Download the Font
The first step to import custom fonts in CapCut is to download the font of your choice. You can download fonts from a variety of websites, including font repositories and graphic design resources. Once you have found the font you want to use, click on it to start the download process. The font file will typically come in a zip format, so you will need to extract it to access the font files.
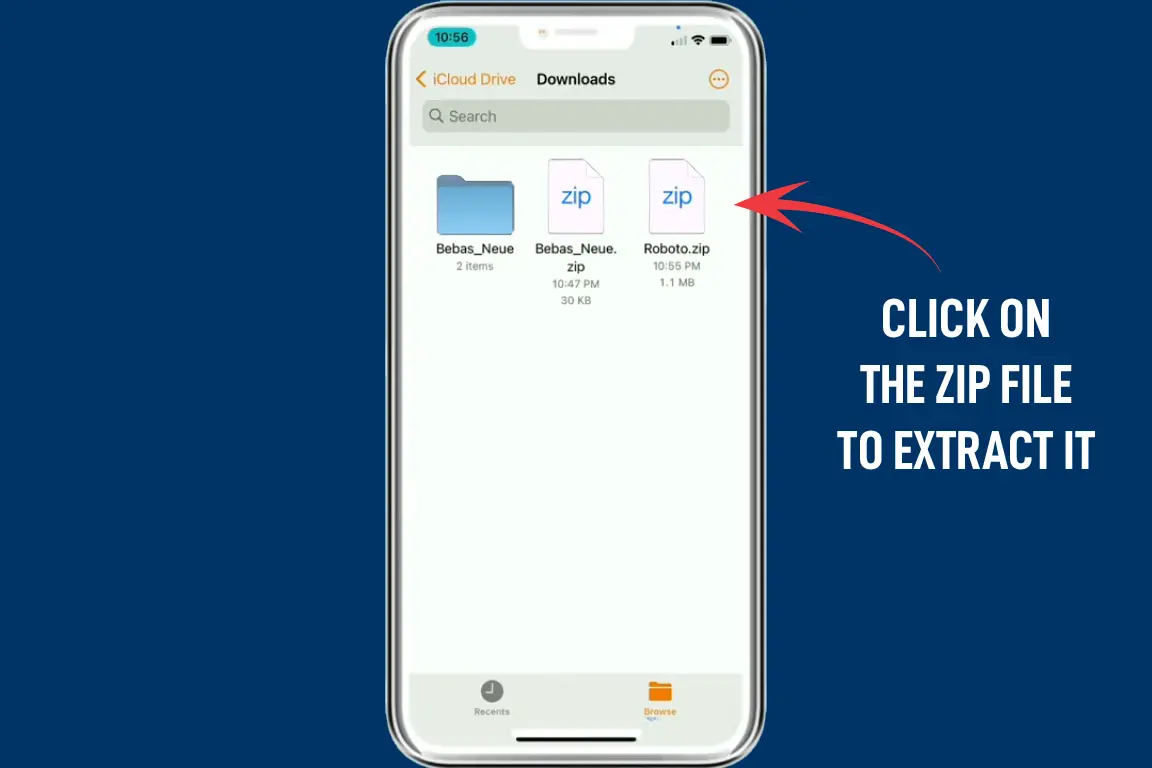
Step 2: Extract the Font Files
Once you have downloaded the font, it is time to extract the files from the zip archive. To do this, simply click on the zip file to extract it in a new folder, or open it and then drag the font files to a new folder. Most fonts come in either .ttf or .otf format, and you will need to make note of the file format of the font you have downloaded.
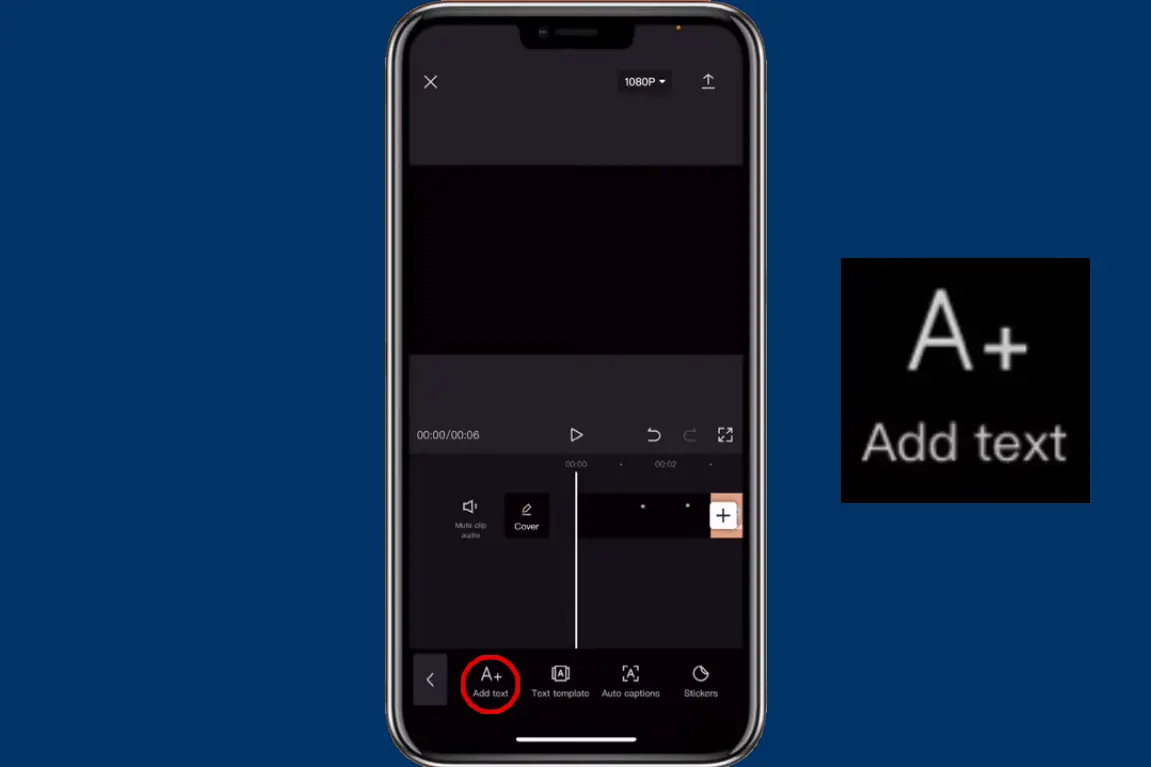
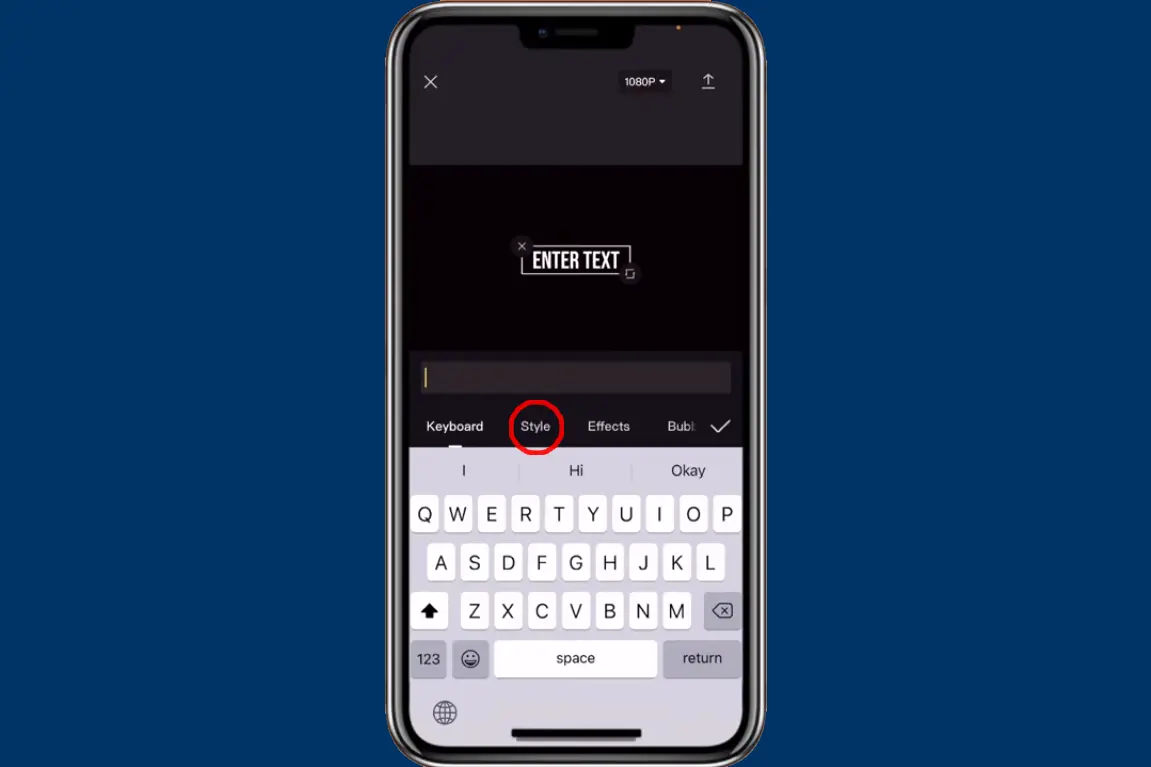
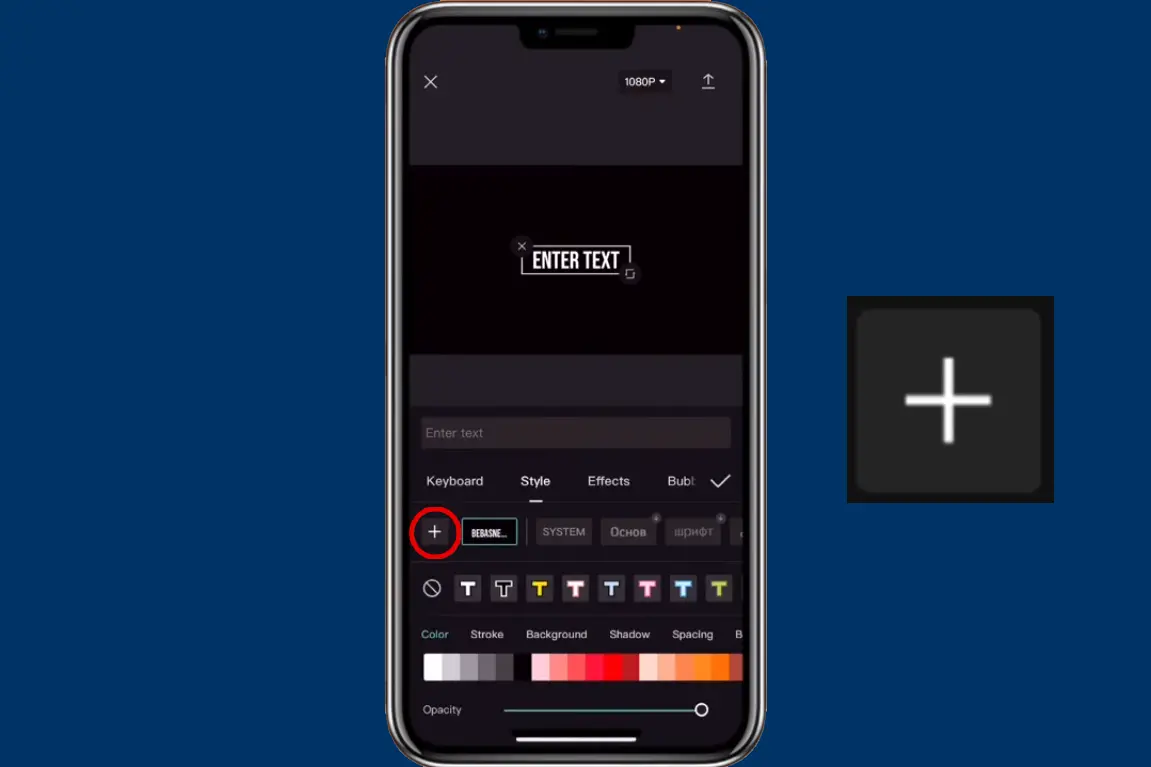
Step 3: Import the Font in CapCut
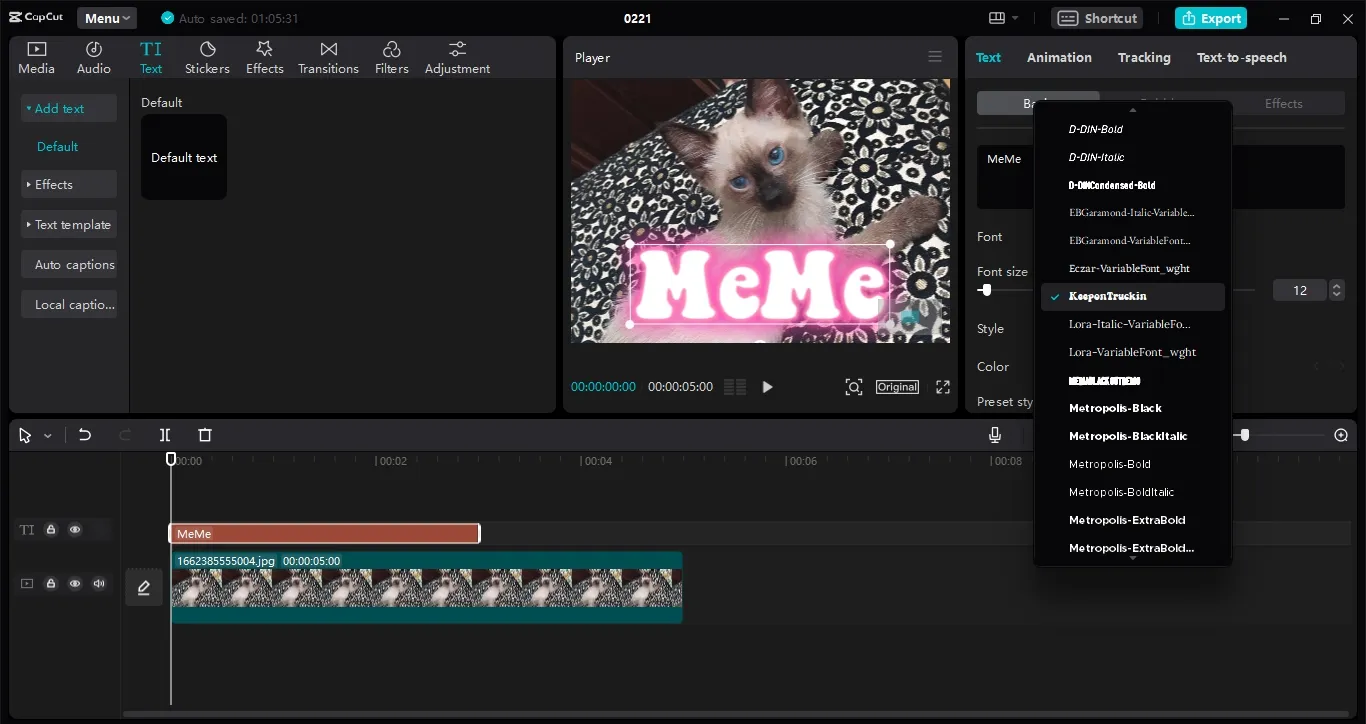
With the font files extracted and ready to use, it’s time to open CapCut and import the font. To do this, first, click on the “Text” option in the main menu, then select “Add Text“. Next, click on “style” and you will see a plus icon “+“. Click on this icon to open the font import menu.

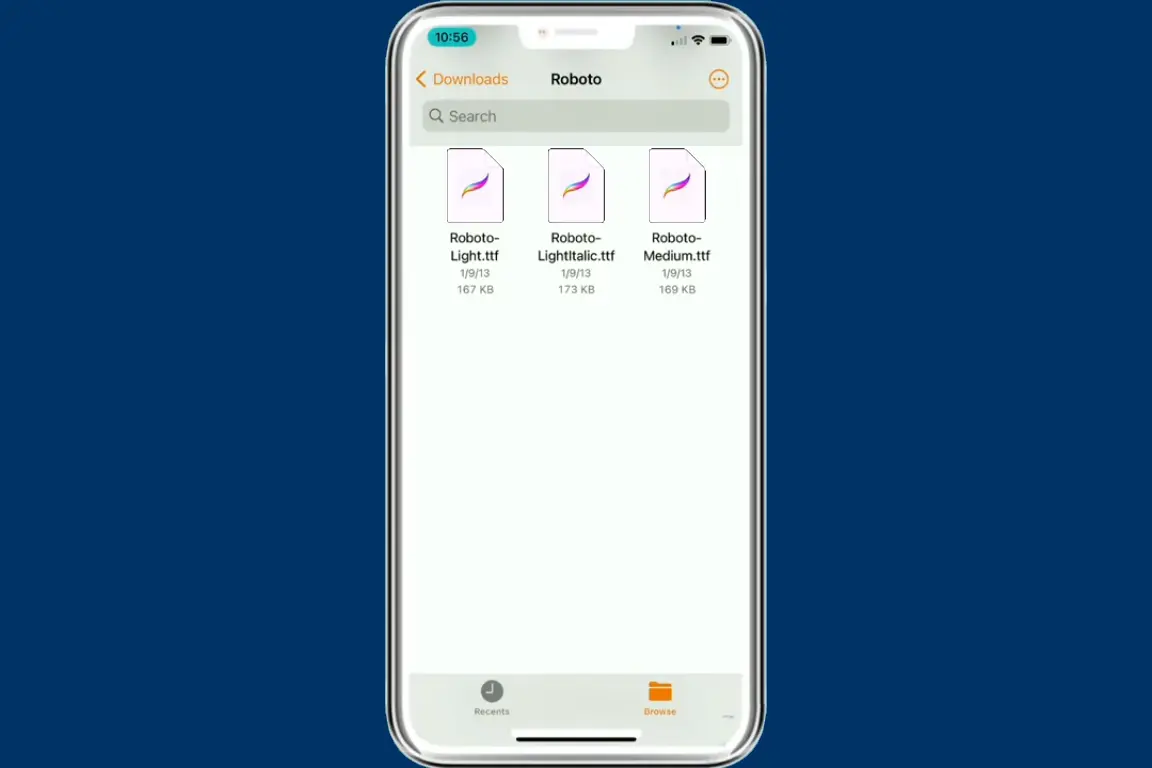
Step 4: Locate the Font Files
Now, navigate to the folder where you extracted the font files and select the font file you want to use. With the font file selected, simply click on it or the “Import” button to bring it into CapCut. The font will now be available in the font menu and can be used to add custom text to your videos.

Step 5: Use the Custom Font
With the custom font imported into CapCut, it is now time to start using it in your projects. To do this, simply select the custom font from the font menu and apply it to your text. You can also adjust the font size, style, and color to match your creative vision.
How to Add Custom Fonts to CapCut PC
To add custom fonts to CapCut on your PC is a great way to enhance the creativity and uniqueness of your videos. With CapCut’s easy-to-use interface, incorporating a custom font into your videos is a hassle-free process. In this tutorial, we’ll walk you through the simple steps to add a custom font to CapCut on your PC, whether you’re using Windows or Mac.
Step 1: Download and Install Your Desired Font
The first step in adding a custom font to CapCut on your PC is to download and install the font you want to use. There are several websites on the internet that offer free and paid fonts. Some of the popular websites include dafont.com, fontsquirrel.com, and google.com/fonts.
Once you’ve found the font you want to use, download and install it on your computer. If you’re not sure how to install a font on your PC, you can follow the steps in this tutorial: https://fontswan.com/how-to-install-fonts-on-pc-windows-and-mac/. The process is simple and can be completed in just a few clicks.
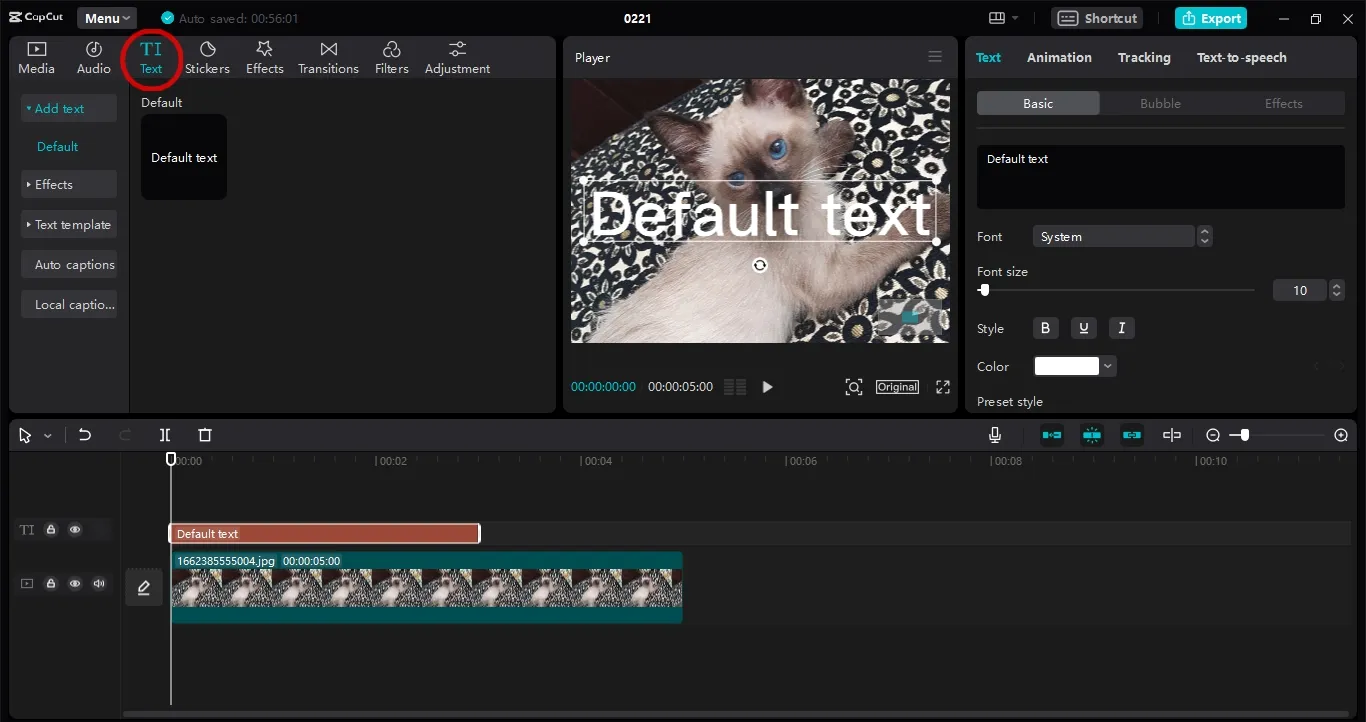
Step 2: Open CapCut and Add Text Element
After installing your desired font, open CapCut on your PC. You can open CapCut either by double-clicking on the desktop icon or by searching for it in the Windows Start menu or the Mac Launchpad.
Once CapCut is open, click on the “Text” button to add a new text element to your video. You can find the “Text” button in the toolbar at the top of the screen.
Step 3: Select Your Custom Font
Next, click on the “Font” dropdown menu in the “Text” tab. From the dropdown menu, select “System.” This will display all the fonts installed on your computer.
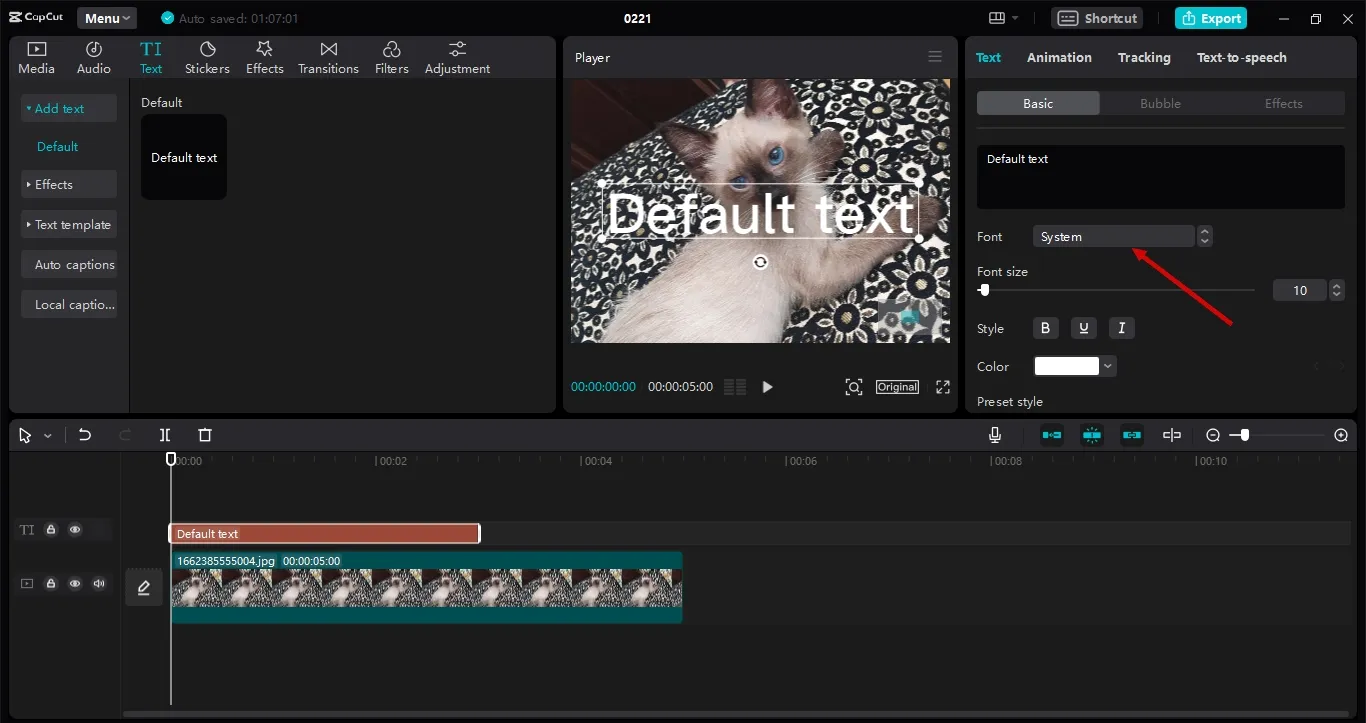
In the “dropdown menu” window, scroll down until you find the custom font you downloaded and installed earlier. Once you find the font, click on it to select it.
That’s it! Your custom font is now available for use in CapCut on your PC. You can use the font in your text elements by typing your desired text and selecting the font from the “Font” dropdown menu.
Conclusion
To import custom fonts in CapCut on your PC or Android is an effortless task that can significantly enhance the visual appeal of your videos. By following the simple steps outlined in this tutorial, you can easily download, install and use your desired custom font in CapCut on your PC. So, go ahead and experiment with different fonts to make your videos stand out!
How to install fonts on Windows and Mac
How to Add Fonts to Cricut Design Space